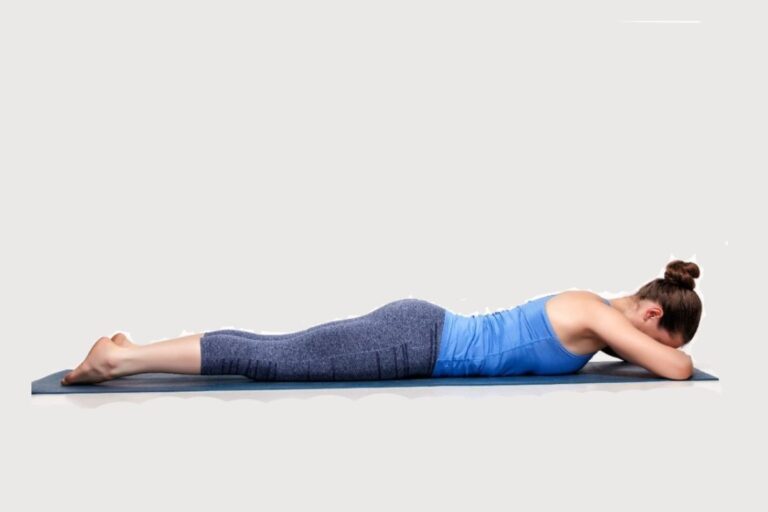
Pawanmuktasana Series 2 focuses on digestive and abdominal yoga poses designed to strengthen the digestive system.
As the second part of the three-part Pawanmuktasana series, these asanas are beneficial for various conditions including indigestion, constipation, acidity, gas, poor appetite, diabetes, reproductive disorders, and varicose veins.
They also aid in clearing energy blockages in the abdominal region.
Awareness : Throughout the practice become aware of the following:
- Movement
- Intra-abdominal pressure
- The stretch of the muscles
- Breathing
Periodic rest :
Before starting the practice, the body and mind should be calm and relaxed. This is best achieved through the practice of shavasana. In addition, a short rest should be taken between asanas, lying in shavasana. One minute or thirty seconds should be sufficient, but a more reliable guide is to rest until the breathing returns to normal.
Contra-indications:
These practices should be avoided by individuals with high blood pressure, serious heart issues, back problems like sciatica or slipped disc, or those recovering from abdominal surgery.
It’s important to consult a qualified therapist if unsure.
For poses involving raised feet, additional precautions for inverted asanas and specific contraindications must be followed.
How to do each pose in Pawanmuktasana series 2
Lying down
- The arms should be by the sides, palms down, and the head, neck, and spine in a straight line.
- Be sure to use a thin mat or a blanket
Padotthanasana (raised legs pose)
STAGE 1
- Inhale and raise the right leg as high as is comfortable, keeping it straight and the foot relaxed.
- The left leg should remain straight and in contact with the floor.
- Hold the posture for 3 to 5 seconds while retaining the breath.
- Exhale and slowly lower the leg to the floor.
- This is one round.
- Practise 10 rounds with the right leg and then 10 rounds with the left leg.
- If the back is weak, the left leg can be bent so that the foot is flat on the floor and the knee is up.
Breathing:
- Inhale while raising the leg(s).
- Hold the posture and the breath.
- Exhale while lowering the leg(s).
Awareness: On the stretch in the legs and synchronizing the movement with the breath.
Contra-indications: Not to be performed by persons suffering from high blood pressure or serious back conditions such as sciatica and slipped disc.
Stage 2:
- This may be repeated by raising both legs together, but do not strain. Be aware that this is a more strenuous practice.
- Do not lift the buttocks off the floor.
Breathing: Inhale in the starting position. Hold the breath in while raising the legs.
Exhale while lowering the legs.
Awareness: On the stretch in the legs, the muscular effort in the back and abdomen, and synchronizing the movement with the breath.
Benefits: This asana strengthens the abdominal muscles and massages the organs. It strengthens the digestive system, lower back, pelvic and perineal muscles and helps correct prolapse.
Practice note: Padotthanasana may be repeated raising the legs to progressive heights in each round.
PADACHAKRASANA
Practice 2: Padachakrasana (leg rotation)
STAGE 1:
- Raise the right leg 5 cm from the ground, keeping the knee straight.
- Rotate the entire leg clockwise 10 times in as large a circle as comfortable.
- The heel should not touch the floor at any time during the rotation.
- Rotate 10 times anti-clockwise.
- Repeat with the left leg, first clockwise, then anti-clockwise.
Stage 2: This may be repeated by raising both legs together, but do not strain. Be aware that this is a more strenuous practice. Keep the legs together and straight throughout the practice. Rotate both legs clockwise and then anti-clockwise 3 to 5 times. The circular movement should be as large as possible.
Breathing: Inhale while moving the leg(s) upwards. Exhale while lowering the leg(s).
Awareness: On the rotation of the leg(s), the effects of the asana on the hips and abdomen, and synchronizing the movements with the breath.
Contra-indications: Not to be performed by persons suffering from high blood pressure or serious back conditions such as sciatica and slipped disc.
Benefits: Good for the hip joints, obesity, toning of the abdominal and spinal muscles.
Join Yoga Teacher Teacher Training in India
PADA SANCHALANASANA
Practice 3: Pada Sanchalanasana (cycling)
Stage I:
- Raise the right leg.
- Bend the knee and bring the thigh to the chest.
- Raise and straighten the leg completely.
- Then lower the straight leg in a forward movement.
- Bend the knee and bring it back to the chest to complete the cycling movement.
- The heel should not touch the floor during the movement.
- Practise 10 times in a forward direction and then 10 times in reverse.
Breathing: Inhale while straightening the leg. Exhale while bending the knee and bringing the thigh to the chest.
Stage 2: Raise both legs. Practise alternate cycling movements as though peddling a bicycle. Practice 10 times forward and then 10 times backward.
Breathing: Breathe normally throughout.
Stage 3: Raise both legs and keep them together throughout the practice.
Bring the knees as close as possible to the chest on the backward movement and straighten the legs fully on the forward movement. Slowly lower the legs together, keeping the knees straight, until the legs are just above the floor. Then bend the knees and bring them back to the chest. Practise 3 to 5 forward cycling movements and the same in reverse.
Do not strain.
Breathing: Inhale while straightening the legs. Exhale while bending the legs to the chest.
Awareness: On the smoothness of the movement and proper coordination, especially while reverse cycling. When relaxing, be aware of the abdomen, hip, thighs and lower back, and the breath.
Contra-indications: Not to be performed by persons suffering from high blood pressure or serious back conditions such as sciatica and slipped disc.
Benefits: Good for hip and knee joints. Strengthens abdominal and lower back muscles.
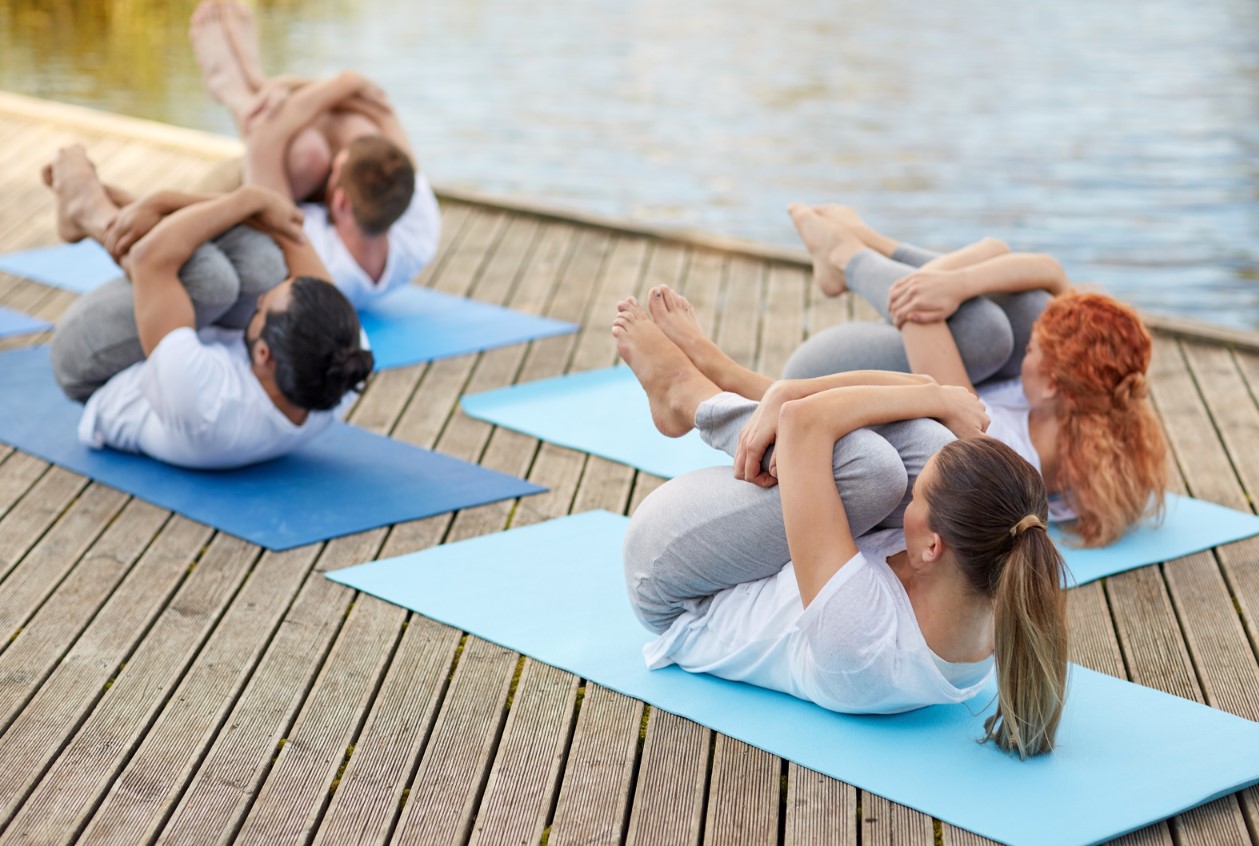
Practice 4: Supta Pawanmuktasana (leg lock pose)
Stage I
- Bend the right knee and bring the thigh to the chest. Interlock the fingers and clasp the hands on the shin just below the right knee.
- Keep the left leg straight and on the ground.
- Inhale deeply, filling the lungs as much as possible.
- Exhaling, raise the head and shoulders off the ground and without straining, bring the right knee to the nose.
- Remain in the final position for a few seconds. While slowly inhaling, return to the base position. Relax the body.
Practice note: Ensure that the straight leg remains in contact with the ground. It is important to start with the right leg because it presses the ascending colon directly. Follow with the left leg which presses the descending colon directly.
Stage 2: Remain in the starting position. Bend both knees and bring the thighs to the chest. Interlock the fingers and clasp the hands on the shin bones just below the knees. Inhale deeply. Exhaling, raise the head and shoulders and try to place the nose in the space· between the two knees. Hold the raised position for a few seconds, counting mentally. Slowly lower the head, shoulders and legs while inhaling.
Practice this 3 times.
Awareness: On the movement, the abdominal pressure, and the breath.
Contra-indications: Not to be performed by persons suffering from high blood pressure or serious back conditions such as sciatica and slipped disc.
Benefits: Supta pawanmuktasana strengthens the lower back muscles and loosens the spinal vertebrae. It massages the abdomen and the digestive organs and is therefore very effective in removing wind and constipation. By massaging the pelvic muscles and reproductive organs, it is also useful for impotence, sterility and menstrual problems.
Jhulana Lurhakanasana
Practice 5: Jhulana Lurhakanasana (rocking and rolling)
Stage I :
- Lie flat on the back. Bend both legs to the chest.
- Interlock the fingers of both hands and clasp them around the shins just below the knees.
- This is the starting position.
- Roll the body from side to side 5 to 10 times, touching the side of the legs on the floor.
Breathing: Exhale while rolling to one side. Inhale while returning to the centre. Exhale rolling to the other side.
Stage 2: Sit in the squatting position with the buttocks just above the floor. Interlock the fingers of both hands and clasp them around the shins just below the knees.
Rock the whole body backwards and forwards on the spine. Try to come up into the squatting pose on the feet when rocking forward. If it is difficult to perform with the hands clasped on the shins, then hold the side of the thighs adjacent to the knees.
Practice 5 to 10 backward and forward movements.
Breathing: Inhale as you roll backwards. Exhale as you come forward. Awareness: On the coordination of movement.
Contra-indications: Not to be performed by persons with serious back conditions. Benefits: This asana massages the back, buttocks and hips. It is most useful if done first thing in the morning after waking.
Practice note: Use a folded blanket for this practice so that there is no possibility of causing damage to the spine. While rocking back, the head should remain forward. Be careful not to hit the head on the floor.
SUPTA UDARAKARSHANASANA
Practice 6: Supta Udarakarshanasana (sleeping abdominal stretch pose)
- Bend the knees and place the soles of both feet flat on the floor, directly in front of the buttocks.
- Keep the knees and feet together throughout the practice.
- Interlock the fingers of both hands, place the palms under the back of the head and let the elbows touch the floor.
- Breathe in, and while breathing out, slowly lower the legs to the right, trying to bring the knees down to the floor.
- The feet should remain in contact with each other, although the left foot will move slightly off the floor. At the same time, gently turn the head and neck in the opposite direction to the legs. This will give a uniform twisting stretch to the entire spine
Variation: Bend the knees and bring the thighs up to the chest. Interlock the fingers and place them behind the head. Roll the body from side to side, keeping the elbows on the floor.
Breathing: Exhale while lowering the legs to the sides. Hold the breath in the final position. Inhale while raising the legs.
Awareness: On the twisting stretch of the paraspinal and abdominal muscles, and the breath.
Benefits: This asana gives an excellent stretch to the abdominal muscles and organs, and thereby helps to improve digestion and eliminate constipation. The twisting stretch of the spinal muscles relieves the strain and stiffness caused by prolonged sitting. The distance of the feet from the buttocks determines the placement of the spinal twist. If the feet are about 60 cm from the buttocks, the adjustment is in the lower area of the spine. As the feet approach the buttocks, the adjustment rises up the spine. When the feet are next to the buttocks, the adjustment is in the area of the cardiac plexus. Therefore, moving the feet about 3 cm each time works on each vertebra, bringing suppleness to the whole spinal column.
SHAVA UDARAKARSHANASANA
Practice 7: Shava Udarakarshanasana (universal spinal twist)
- Lie in the starting position with the legs and feet together. Stretch the arms out to the sides at shoulder level with the palms of the hands facing down.
- Bend the right leg and place the sole of the foot beside the left kneecap. Place the left hand on top of the right knee. This is the starting position.
- Gently bring the right knee down towards the floor on the left side of the body, keeping the leg bent and the foot in contact with the left knee.
- Turn the head to the right, looking along the straight arm, and gaze at the middle finger of the right hand.
- The left hand should be on the right knee and the right arm and shoulder should remain in contact with the floor. In the final position, the head should be turned in the opposite direction to the folded knee and the other leg should remain straight.
- Hold the position for as long as is comfortable
Breathing: Inhale in the starting position. Exhale while pushing the knee towards the floor and turning the head. 57 Breathe deeply and slowly in the final position. Inhale while centring the body and exhale while straightening the leg.
Awareness: On the relaxation of the back, arms and shoulders, and the breath.
Sequence: This asana should be performed after forward and backward bending asanas or those that are strenuous on the lower back, and after sitting in chairs or in meditation asanas for extended periods of time.
Contra-indications: This asana can realign the hip joint. It should be stopped if the practice is painful. Benefits: Tightness and tiredness are relieved, especially in the lower back. The pelvic and abdominal organs are toned through its massaging action.
NAUKASANA
Practice 8: Naukasana (boat pose)
- Breathe in deeply. Hold the breath and then raise the legs, arms, shoulders, head and trunk off the ground. The shoulders and feet should be no more than 15 cm off the floor. Balance the body on the buttocks and keep the spine straight.
- The arms should be held at the same level and in line with the toes. The hands should be open with the palms down. Look towards the toes.
- Remain in the final position and hold the breath. Count to 5 mentally (or for longer if possible).
- Breathe out and return to the supine position. Be careful not to injure the back of the head while returning to the floor.
- Relax the whole body.
- This is one round.
- Practice 3 to 5 rounds.
- Relax in shavasana after each round, gently pushing out the abdomen with inhalation to relax the stomach muscles.
Variation: Repeat the same process as above, but clench the f ists and tense the whole body as much as possible in the raised position.
Breathing: Inhale before raising the body. Retain the breath while raising, tensing and lowering the body. Exhale as you return to the starting position.
Awareness: On the movement, mental counting and tensing of the body (especially the abdominal muscles) in the final position, and the breath.
Benefits: This asana stimulates the muscular, digestive, circulatory, nervous and hormonal systems, tones all the organs and removes lethargy. It is especially useful for eliminating nervous tension and bringing about deep relaxation. It may be performed before shavasana in order to attain a deeper state of relaxation. If practised upon waking, it immediately restores freshness. It is also useful for women preparing for childbearing and may be practised during the second trimester of pregnancy.
Delve into the transformative Pawanmuktasana Series 2 by attending a best yoga school and enrolling in a comprehensive 200 hour yoga teacher training in rishikesh. Unlock your potential and elevate your practice today!